Some links on this page are affiliate links. We may earn a commission when you click through and make a purchase, at no additional cost to you.
WordPress 7.0 introduces a built-in AI Client, a PHP API designed to let plugins send prompts to AI providers and receive generated results seamlessly. This tutorial walks you through building a simple yet functional plugin that generates images directly within the WordPress Media Library, using the new AI Client. Along the way, you’ll learn key patterns for integrating AI-powered features reliably in WordPress.
Key Takeaways
- The WordPress AI Client abstracts AI provider details, allowing plugins to work with multiple services without vendor lock-in.
- Using
wp_ai_client_prompt(), you can build prompts flexibly for image generation with model preferences and configuration options. - Support checks let you conditionally enable AI features only when supported, improving user experience and avoiding errors.
- This tutorial covers creating the plugin file structure, REST API integration, frontend UI, and media uploads.
- Following these patterns ensures your plugin remains portable and compatible as new AI providers and models emerge.
Prerequisites
- WordPress 7.0 or later installed, as it includes the built-in AI Client.
- Basic knowledge of PHP and WordPress plugin development.
- Familiarity with the WordPress REST API and enqueueing scripts.
- A configured AI provider connection in WordPress Settings > Connectors.
Plugin File Structure
Start by creating a new folder inside wp-content/plugins, for example wp-ai-image-gen. Inside this folder, create the main plugin file wp-ai-image-gen.php and a subfolder assets/js for your JavaScript files.
Basic structure:
wp-ai-image-gen/
├── wp-ai-image-gen.php
└── assets/
    └── js/
        └── admin.js
Building the Main Plugin File
The main plugin file declares the plugin header, hooks into WordPress initialization, registers REST routes, and enqueues admin scripts conditionally based on AI feature support.
<?php
/**
 * Plugin Name: WP AI Image Generator
 * Description: Generates AI images directly in the Media Library using the WordPress AI Client.
 * Version: 1.0
 * Author: Your Name
 */

// Exit if accessed directly.
if ( ! defined( 'ABSPATH' ) ) {
    exit;
}

// Check if AI image generation is supported.
function wp_ai_image_gen_is_supported() {
    return wp_ai_client_prompt()
        ->with_text( 'test' )
        ->is_supported_for_image_generation();
}

// Register REST route for image generation.
add_action( 'rest_api_init', function () {
    register_rest_route( 'wp-ai-image-gen/v1', '/generate', [
        'methods'             => 'POST',
        'callback'            => 'wp_ai_image_gen_generate_image',
        'permission_callback' => function () {
            return current_user_can( 'upload_files' );
        },
        'args'                => [
            'prompt' => [
                'required'          => true,
                'type'              => 'string',
                'sanitize_callback' => 'sanitize_text_field',
            ],
        ],
    ]);
});

// Generate image handler.
function wp_ai_image_gen_generate_image( WP_REST_Request $request ) {
    if ( ! wp_ai_image_gen_is_supported() ) {
        return new WP_Error( 'ai_not_supported', 'AI image generation is not supported on this site.', [ 'status' => 400 ] );
    }

    $prompt_text = $request->get_param( 'prompt' );

    $builder = wp_ai_client_prompt()
        ->with_text( $prompt_text )
        ->with_image_size( '1024x1024' ) // example size; adjust as needed
        ->with_image_format( 'png' )
        ->using_model_preference( 'dall-e-3', 'stable-diffusion-2' );

    $result = $builder->generate_image_result();

    if ( ! $result->is_success() ) {
        return new WP_Error( 'generation_failed', 'Image generation failed.', [ 'status' => 500 ] );
    }

    $image_url = $result->get_image_url();
    $image_data = file_get_contents( $image_url );
    if ( ! $image_data ) {
        return new WP_Error( 'fetch_failed', 'Failed to retrieve generated image.', [ 'status' => 500 ] );
    }

    // Upload image to Media Library.
    $upload = wp_ai_image_gen_upload_to_media_library( $image_data, $prompt_text );
    if ( is_wp_error( $upload ) ) {
        return $upload;
    }

    return rest_ensure_response( [
        'media_id'  => $upload,
        'media_url' => wp_get_attachment_url( $upload ),
    ]);
}

// Helper function to upload image data to the Media Library.
function wp_ai_image_gen_upload_to_media_library( $image_data, $prompt_text ) {
    $filename = sanitize_file_name( substr( $prompt_text, 0, 20 ) ) . '-' . time() . '.png';
    $upload_file = wp_upload_bits( $filename, null, $image_data );

    if ( $upload_file['error'] ) {
        return new WP_Error( 'upload_error', $upload_file['error'], [ 'status' => 500 ] );
    }

    $filetype = wp_check_filetype( $upload_file['file'], null );

    $attachment = [
        'post_mime_type' => $filetype['type'],
        'post_title'     => sanitize_text_field( $prompt_text ),
        'post_content'   => '',
        'post_status'    => 'inherit',
    ];

    $attach_id = wp_insert_attachment( $attachment, $upload_file['file'] );
    if ( ! $attach_id ) {
        return new WP_Error( 'attachment_failed', 'Failed to insert attachment.', [ 'status' => 500 ] );
    }

    require_once ABSPATH . 'wp-admin/includes/image.php';
    $attach_data = wp_generate_attachment_metadata( $attach_id, $upload_file['file'] );
    wp_update_attachment_metadata( $attach_id, $attach_data );

    return $attach_id;
}

// Enqueue admin scripts conditionally.
add_action( 'admin_enqueue_scripts', function ( $hook ) {
    if ( ! wp_ai_image_gen_is_supported() ) {
        return;
    }

    if ( 'upload.php' !== $hook ) {
        return;
    }

    wp_enqueue_script(
        'wp-ai-image-gen-admin',
        plugin_dir_url( __FILE__ ) . 'assets/js/admin.js',
        [ 'jquery', 'wp-element' ],
        '1.0',
        true
    );

    wp_localize_script( 'wp-ai-image-gen-admin', 'WP_AI_Image_Gen', [
        'rest_url' => esc_url_raw( rest_url( 'wp-ai-image-gen/v1/generate' ) ),
        'nonce'    => wp_create_nonce( 'wp_rest' ),
    ]);
});
Building the Prompt
The prompt builder is the core interaction with the AI Client. Use wp_ai_client_prompt() to create a new prompt builder instance. Then chain methods to specify what you want from the AI.
For image generation, specify the prompt text with with_text(), set the desired image size with with_image_size() (e.g., ‘512×512’, ‘1024×1024’), and choose the output format with with_image_format(), typically ‘png’ or ‘jpeg’.
Model preferences can be set using using_model_preference() to prefer models optimized for image generation, but the plugin will gracefully fallback if those aren’t available.
Creating the REST API Endpoint
The plugin registers a REST API route /wp-ai-image-gen/v1/generate that accepts POST requests. It requires a ‘prompt’ parameter containing the image description text.
Permissions are limited to users who can upload files, typically editors or administrators, to control access.
Inside the endpoint handler, first verify AI image generation support using is_supported_for_image_generation(). Then build the prompt, generate the image, fetch the generated image data, and upload it to the Media Library.
Uploading Generated Images to the Media Library
Once the AI provider returns an image URL, the plugin downloads the image data and uses wp_upload_bits() to save the file in WordPress uploads. Then it creates an attachment post with wp_insert_attachment(), generates metadata, and updates the attachment.
Storing generated images in the Media Library allows users to manage, edit, or reuse them just like any other media asset.
Admin Integration and Frontend UI
To provide a user interface, enqueue a JavaScript file on the Media Library page (upload.php) only if AI image generation is supported.
The script communicates with the REST API endpoint and handles user input for prompt text, triggering image generation, and displaying results or errors.
Conditional script loading enhances performance and avoids confusing users when the feature is unavailable.
Example Admin JavaScript
( function ( $ ) {
$( document ).ready( function () {
var container = $( '' );
var input = $( '' );
var button = $( '' );
var status = $( '' );
container.append( input, button, status );
$( '#wpbody-content .wrap h1' ).after( container );
button.on( 'click', function () {
var prompt = input.val().trim();
if ( ! prompt ) {
status.text( 'Please enter a prompt.' );
return;
}
status.text( 'Generating image...' );
button.prop( 'disabled', true );
$.ajax({
url: WP_AI_Image_Gen.rest_url,
method: 'POST',
beforeSend: function ( xhr ) {
xhr.setRequestHeader( 'X-WP-Nonce', WP_AI_Image_Gen.nonce );
},
data: { prompt: prompt },
success: function ( response ) {
status.html( 'Image generated and uploaded: View Image' );
input.val( '' );
},
error: function ( jqXHR ) {
var errorMsg = 'An error occurred.';
if ( jqXHR.responseJSON && jqXHR.responseJSON.message ) {
errorMsg = jqXHR.responseJSON.message;
}
status.text( errorMsg );
},
complete: function () {
button.prop( 'disabled', false );
},
});
});
});
})( jQuery );
Testing Your Plugin
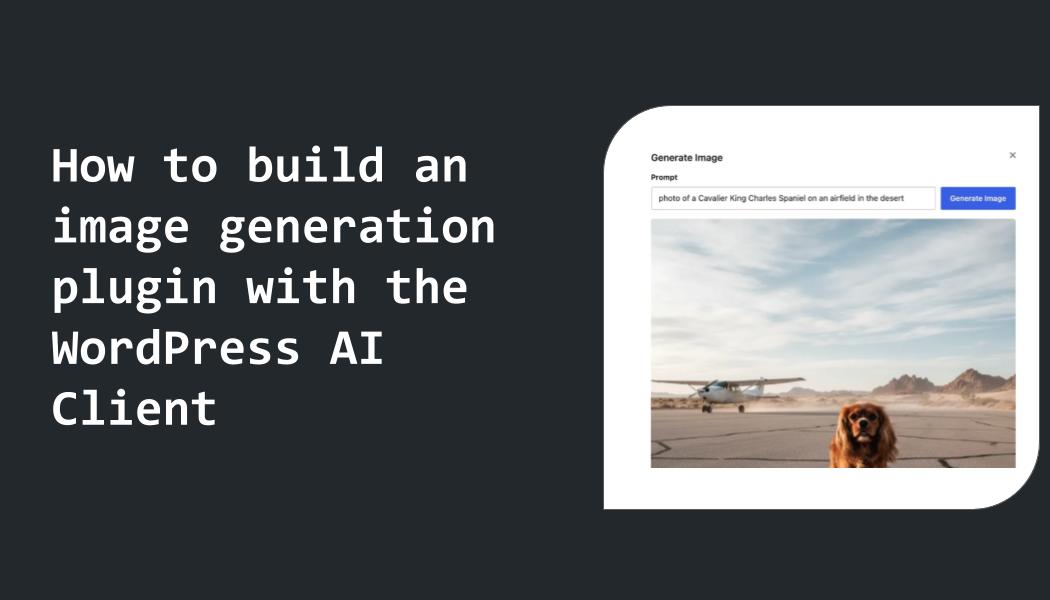
Activate your plugin and navigate to the Media Library in the admin dashboard. If the AI provider is configured and image generation is supported, you should see the input field and button above the media list.
Enter a descriptive prompt such as “A futuristic cityscape at sunset” and click “Generate Image”. The plugin will send the prompt to the AI Client, generate an image, upload it to the Media Library, and provide a link to the new image.
Verify the image appears correctly in the Media Library and can be inserted into posts or pages.
Wrapping Up
This tutorial demonstrates a practical approach to integrating the new WordPress AI Client for image generation. By relying on the built-in client, your plugin remains independent of specific AI providers, ensuring longevity and compatibility as the ecosystem evolves.
Key takeaways include using model preferences instead of hard requirements, performing support checks before offering features, and leveraging the REST API for flexible frontend integration.
While this example is intentionally minimal, it provides a solid foundation to build on. You can expand with features like prompt presets, image editing, or integration with block editors like Divi/" rel="nofollow noopener" target="_blank">Divi for richer user experiences.
What This Means for WordPress Users
We are witnessing a shift in how WordPress integrates AI capabilities. The built-in AI Client standardizes communication with multiple AI services, reducing fragmentation and vendor lock-in risks for plugin developers.
For plugin authors, adopting the AI Client means less maintenance overhead and broader compatibility. Your plugins can immediately support new AI models as they become available without code changes.
Site owners gain flexibility to choose their preferred AI providers through centralized settings. This respects user control and aligns with WordPress’s philosophy of ownership and openness.
For agencies and freelancers, AI-powered features like image generation open new creative possibilities to enhance client sites, streamline content creation workflows, and add unique value.
However, careful design is essential: AI features must gracefully degrade when unsupported and provide clear user feedback. This tutorial’s approach to support checks and conditional UI loading exemplifies best practices.
Overall, the WordPress AI Client positions the ecosystem for scalable AI integration, where plugins are adaptable and users stay in control. We recommend developers begin experimenting with the AI Client now to prepare for the next generation of AI-enhanced WordPress experiences.
Frequently Asked Questions
What AI providers can I use with the WordPress AI Client?
The AI Client supports multiple providers such as Anthropic, Google, OpenAI, and any others integrated via connectors. Site owners manage provider connections and API keys centrally in Settings > Connectors, enabling plugins to work without provider-specific code.
How do I check if image generation is supported on a site?
Use the is_supported_for_image_generation() method on the AI prompt builder. This method returns true if a configured provider has a model that supports image generation, allowing your plugin to conditionally enable related features.
Can I specify which AI model to use for image generation?
Yes, you can provide model preferences using using_model_preference(), passing one or more model slugs in order of preference. The client tries these models and falls back if unavailable. Avoid hard requirements to maintain portability.
Is it possible to extend this plugin to support block editor integration?
Absolutely. You can create a custom block that interacts with the REST API endpoint for image generation, allowing users to generate images directly within the editor interface. This enhances the user experience and fits modern content workflows.